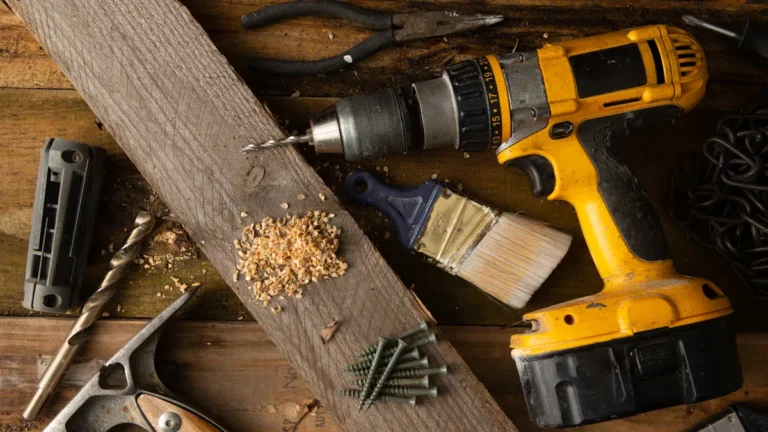
Using a hand saw correctly is essential for achieving perfect cuts. You gain satisfaction from making precise cuts that enhance your DIY projects. However, many users worry about maintaining accuracy and achieving clean finishes. Common concerns include the quality of the saw, the importance of layout during cutting, and the type of saw and its teeth per inch (TPI). Remember, a well-maintained tool can make all the difference in your results.
Key Takeaways
Maintain a proper grip and body position to enhance control and accuracy while sawing.
Use the correct sawing angle: 45 degrees for crosscuts and 90 degrees for rip cuts to avoid jagged edges.
Establish a kerf before cutting to guide the saw and ensure straight cuts.
Regularly clean and sharpen your handsaw to maintain its performance and extend its lifespan.
Practice consistent pressure and rhythm while sawing to achieve smooth and even cuts.
Avoid Common Mistakes
When using a hand saw, avoiding common mistakes is crucial for achieving perfect cuts. Here are three frequent errors you should watch out for:
Incorrect Sawing Angle
Using the wrong sawing angle can lead to jagged edges and uneven cuts. Always ensure that your saw is positioned at the correct angle relative to the material. A good rule of thumb is to keep the saw at about 45 degrees for crosscuts and 90 degrees for rip cuts. This angle helps maintain control and accuracy throughout the cutting process.
Tip: If you notice the saw binding or the cut veering off course, adjust the angle slightly. A small change can make a significant difference in the quality of your cut.
Poor Body Positioning
Your body positioning plays a vital role in the accuracy of your cuts. Proper alignment helps you maintain control and stability. Here are some key points to remember:
Keep your non-dominant foot forward and your dominant foot back. This stance provides better balance.
Align your wrist and forearm with the saw. Misalignment can force your wrist and shoulder out of position, leading to inaccurate cuts.
Maintain a stable stance to enhance balance and control. This stability allows you to perform various woodworking tasks effectively.
Woodworking experts recommend starting the cut with a push stroke. This technique helps you initiate the cut effectively and maintain control throughout the process.
Inconsistent Pressure
Applying inconsistent pressure while sawing can result in uneven cuts. You should aim for long, even strokes to ensure a smooth cut. Here are some techniques to help you maintain consistent pressure:
Technique | Description |
|---|---|
Proper Positioning | Work with the bark side of the board facing you to reduce splintering. |
Hand Grip | Use a pistol grip with your finger pointing forward to guide the saw accurately. |
Cutting Technique | Start with a push stroke instead of a back stroke for effective cutting. |
Correct Saw Angle | Ensure the saw is angled correctly to maintain a straight cut. |
Even Pressure on the Saw | Maintain long, even movements to ensure a smooth cut. |
Lubricate the Saw | Use mutton tallow or beeswax to reduce friction and heat on the saw plate. |
By avoiding these common mistakes, you can significantly improve your cutting accuracy and achieve the perfect cuts you desire.
Techniques for Starting Hand Saw Cuts

Starting hand saw cuts effectively sets the stage for achieving clean and precise results. Here are some essential techniques to help you begin your cuts with confidence.
Grip and Hand Position
Your grip and hand position significantly influence the accuracy of your cuts. A proper grip resembles a pistol grip, allowing you to point the saw in the desired direction. Here are some key points to remember:
Relaxed Grip: A relaxed grip prevents the saw from jumping or veering off course, enhancing accuracy.
Thumb and Forefinger Position: Extend your thumb and forefinger along the sides of the handle. This helps guide the saw accurately along the line.
Stabilizing the Saw: Use the thumb of your non-sawing hand as a stop. This stabilizes the saw and ensures it starts the cut at the correct line.
By maintaining a proper grip, you can control the saw better and achieve more precise cuts.
Establishing the Kerf
Establishing a kerf is crucial for guiding the saw and ensuring accurate cuts. A kerf is the groove made by the saw blade as it cuts through the material. Here’s how to establish a kerf effectively:
Start your cut with a few strokes in the opposite direction. This creates a light kerf that aids in maintaining the correct cutting line.
A well-defined kerf prevents the saw from jumping out of position, enhancing control during the cutting process.
By taking the time to establish a kerf, you set yourself up for success in achieving straight and clean cuts.
Using a Straight Edge
Using a straight edge can greatly improve the accuracy of your cuts. Here are some effective methods for maintaining control and precision when starting a hand saw cut:
Use the Reflection: Align the saw with the reflection of the board to ensure a straight cut.
Start with Crosscut Teeth: Use smaller teeth to initiate the cut for better control.
Drop into the Line Gradually: Begin at the corner and create a kerf before sawing into the line for stability.
Relax Your Grip: Maintain a relaxed grip to let the saw do the work.
Utilize Built-in Depth Stops: If using a Japanese saw, take advantage of the depth stop feature for precision.
By following these techniques, you can start your hand saw cuts with confidence and achieve the perfect results you desire.
Importance of Hand Saw Angle and Pressure
Using the correct angle and pressure when operating a hand saw significantly impacts the quality of your cuts. Understanding how these factors work together can help you achieve better results.
Understanding the Saw’s Design
The design of your hand saw affects its performance on various materials. Here are some key components to consider:
Component | Impact on Performance |
|---|---|
Blade | The length, thickness, and flexibility of the blade influence cutting efficiency. Longer blades work well for larger cuts, while shorter blades allow for precision. |
Teeth | The number of teeth per inch (TPI) affects cutting speed and smoothness. Higher TPI yields smoother cuts but at a slower pace. Lower TPI allows for faster cuts but results in rougher finishes. |
Tooth Set | The alternating bend of teeth creates a wider kerf, which prevents binding during cuts. |
Choosing the right saw based on these factors can enhance your cutting experience, whether you are making crosscuts or rip cuts.
Adjusting Pressure for Control
The pressure you apply while sawing directly influences the smoothness of your cuts. Here are some important points to keep in mind:
Increasing cutting speed with a coarse-grit blade can worsen cut surface roughness.
Excessive pressure can cause the blade to bind, leading to an uneven cut.
For fine-grit blades, maintain consistent and moderate speed and pressure for smooth cuts.
When cutting hardwood versus softwood, adjust your pressure accordingly. For hardwoods, use a coarse-tooth blade to absorb more material per pass. Avoid excessive swing to prevent splintering. For softwoods, focus on a steady swing to achieve clean cuts.
By understanding the relationship between angle, pressure, and saw design, you can improve your cutting technique and achieve perfect results every time.
Maintaining Your Handsaw

Maintaining your handsaw is essential for ensuring its longevity and performance. Regular maintenance prevents wear and tear, which can lead to decreased cutting efficiency and safety hazards. Here are some key practices to keep your handsaw in top condition.
Cleaning and Lubrication
Cleaning your handsaw after each use helps prevent rust and damage. Follow these steps for effective cleaning and lubrication:
Use light machine oil at pivot points for tools with moving joints.
Avoid WD-40 or degreasers, as they clean but do not leave protective residue.
Opt for synthetic oil with corrosion inhibitors for better protection in outdoor conditions.
Apply oil, cycle the tool, and wipe off excess to prevent debris accumulation.
By keeping your saw clean and lubricated, you ensure smooth operation and extend its lifespan.
Sharpening the Blade
A sharp blade is crucial for efficient cutting. You should sharpen your handsaw blade regularly to maintain optimal performance. Here are some guidelines:
Secure the saw in a vise with soft jaws, leaving the teeth just above the vise line.
Clean the plate and teeth, inspecting for broken teeth or excessive set.
Use a triangular file matched to the tooth pitch. Start by jointing the teeth to create small, uniform flats.
Sharpen each tooth until the flat disappears, maintaining the original angles.
For crosscut patterns, file every other tooth in one direction, then switch to complete the opposing teeth.
After sharpening, use a saw set to restore the correct set for the intended cut.
Some users recommend sharpening blades every six months, while others suggest doing so whenever necessary, depending on the materials being cut.
Proper Storage Techniques
Proper storage is vital to prevent rust and damage to your handsaw. Here are some effective storage methods:
Keep your saw in a closed, tightly sealed container to avoid exposure to dust and moisture.
Control humidity by using a fan or dehumidifier to reduce condensation.
Clean tools after use by wiping down and removing dust and moisture.
Use vapor corrosion inhibitors (VCI) in storage to create a protective layer against rust.
By following these maintenance tips, you can ensure your handsaw remains in excellent condition, ready for your next project.
You can achieve perfect cuts with a hand saw by following key techniques. First, maintain a secure grip and stable stance for better control. Visualize your cut and keep proper angles to avoid jagged edges. Aim for a steady rhythm of 2-3 seconds per stroke to enhance precision and reduce strain.
Remember to check the blade condition before starting. Dull blades can ruin your cuts. Practice regularly to improve your technique and learn from mistakes. Taking breaks helps you avoid fatigue and maintain focus. Mastering these skills will significantly enhance your DIY projects.
FAQ
What type of hand saw should I use for different materials?
For softwoods, use a saw with fewer teeth per inch (TPI) for faster cuts. For hardwoods, choose a saw with a higher TPI for smoother finishes. Consider the blade length based on the size of your project.
How often should I sharpen my hand saw?
You should sharpen your hand saw whenever you notice it struggling to cut or producing rough edges. Regular maintenance every six months is a good rule, but adjust based on usage and material types.
Can I use a hand saw for metal cutting?
Yes, but you need a specific hand saw designed for metal, such as a hacksaw. These saws have finer teeth and a different blade material to handle metal effectively.
What safety precautions should I take while using a hand saw?
Always wear safety goggles to protect your eyes from debris. Keep your hands clear of the blade path and ensure your workpiece is secure. Use a stable surface to prevent accidents.
How do I know if my hand saw is dull?
If your saw struggles to cut through material or produces rough, jagged edges, it’s likely dull. Regularly inspect the teeth for wear and consider sharpening or replacing the blade as needed.