
Using a router can transform your woodworking projects. This versatile tool enhances both precision and creativity, allowing you to achieve high-quality results. When you use a router, you can create intricate designs and smooth finishes, making it essential for any woodworker. Studies show that when you use a router, it contributes to improved accuracy by automating complex tasks. This automation reduces material waste and ensures consistent quality in your work. Embrace the power of this woodworking tool to elevate your craftsmanship and achieve good results in every project.
Key Takeaways
Select the right router type for your project. Fixed base routers are great for edge work, while plunge routers excel in making mortises and inlays.
Ensure proper setup and adjustments for your router. A stable base and correct depth settings lead to cleaner cuts and better results.
Choose the right router bit for the material you are working with. Use high-speed steel bits for softwoods and solid carbide bits for hardwoods.
Always prioritize safety. Wear protective gear like goggles and ear protection, and keep your workspace organized to prevent accidents.
Avoid common mistakes by checking bit usage and ensuring proper workpiece support. This helps maintain precision and enhances the quality of your woodworking.
Types of Routers
When you start woodworking, understanding the types of routers available is crucial. Each type serves specific purposes and can enhance your projects significantly.
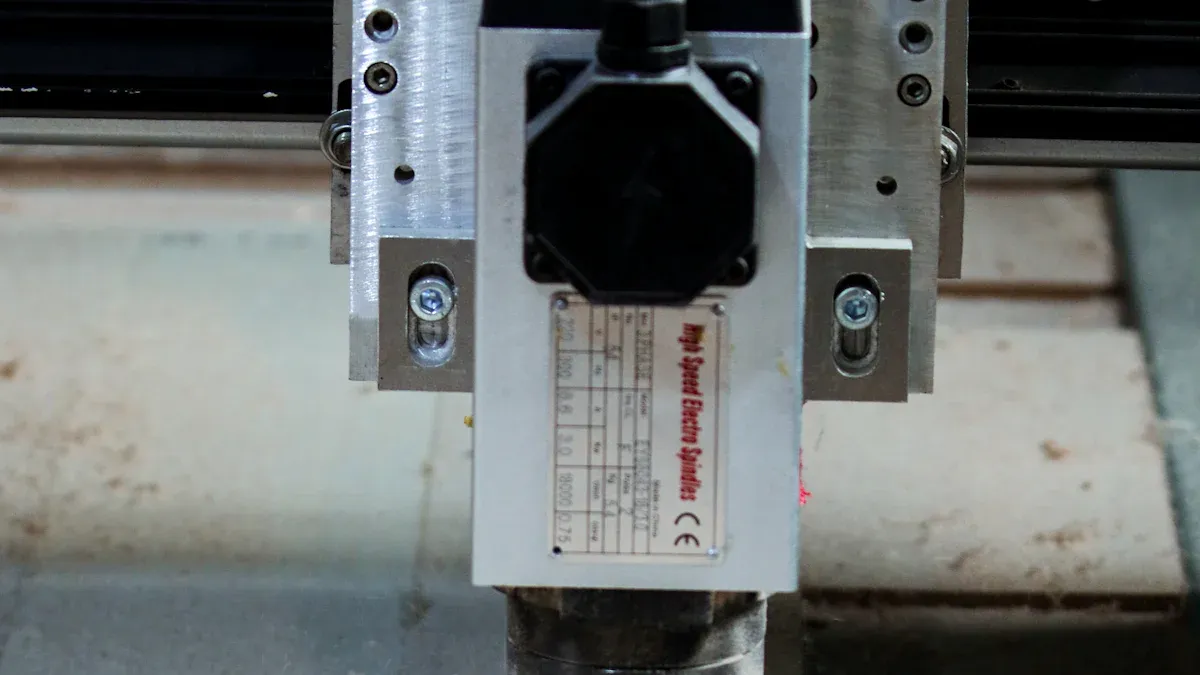
Fixed Base
Fixed base routers are traditional tools in woodworking. They provide stability and power, making them suitable for various tasks. You can use them for edge profiling and creating grooves. These routers work well with router tables, allowing for precise cuts. However, they may not be as versatile as other types.
Tip: If you plan to work on larger projects, consider a fixed base router for its power and reliability.
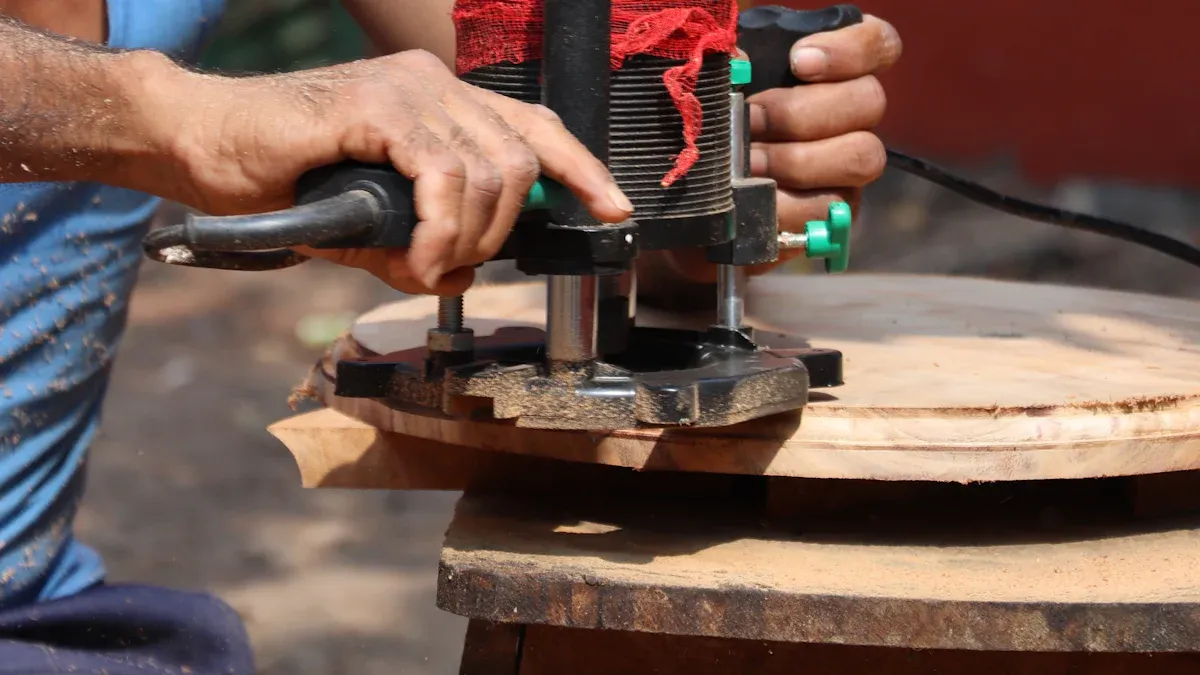
Plunge
Plunge routers offer more flexibility than fixed base routers. They feature guide rods and a spring mechanism, allowing you to adjust the cutting depth easily. This makes them ideal for plunge cuts, such as mortises. You can also use plunge routers for tasks similar to fixed-base routers, but they may be less maneuverable in router tables without micro depth adjustment.
Advantages of Plunge Routers:
Adjustable height for various cuts.
Suitable for intricate designs.
Versatile for different woodworking projects.
Specialty
Specialty routers cater to specific tasks. These routers include laminate trimmers and compact routers. They are lightweight and easy to handle, making them perfect for detailed work. If you often work on smaller projects or need to create decorative edges, a specialty router can be a great addition to your toolkit.
Tip: Choose a router based on the specific needs of your woodworking projects. Consider factors like power, capacity, and available accessories to enhance functionality.
By understanding these types of routers, you can select the right tool for your woodworking projects. Each router type has unique features that can help you achieve perfect results.
Router Techniques for Precision Woodworking
Using a router effectively requires careful attention to setup, bit selection, and routing direction. These techniques will help you achieve precision woodworking and perfectly clean cuts.
Setup and Adjustments
Proper setup is crucial for achieving precision. Start by ensuring your router is securely mounted. Check that the base is level and stable. Misalignment can lead to uneven cuts. Here are some common setup errors and their solutions:
Common Problem | Cause | Solution |
|---|---|---|
Uneven Surface After Flattening | Rail misalignment, sled sagging, inconsistent depth | Recheck and level rails, inspect sled structure, adjust router depth. |
Router Chatter or Vibration Marks | Dull bits, inconsistent feed rate, loose mounting | Replace/sharpen bits, maintain steady feed rate, tighten mounting screws. |
Slab Movement During Cutting | Insufficient clamping, slippery surface | Use multiple clamps, add non-slip mats, build a temporary frame. |
Gouging or Overcut Edges | Sled travel beyond boundaries | Install stop blocks, mark safe travel zones with tape. |
Inconsistent Cut Depth Across Slab | Rails not parallel, router bit wobble | Shim low areas, ensure collet and bit are tightened and concentric. |
Adjusting the router depth and speed is also essential. Proper adjustments impact the quality of your results. For example, using the correct feed rate and speed can lead to larger chips during cutting. This enhances productivity and reduces heat buildup, prolonging the life of your router bit. If adjustments are incorrect, you may produce more dust than chips, indicating a need for changes.
Bit Selection
Choosing the right router bit is vital for achieving perfectly clean cuts. Different materials require different bits. For softwoods, high-speed steel or carbide-tipped bits work well. For hardwoods, solid carbide bits are recommended. Here’s a quick reference:
Wood Type | Recommended Router Bit Type |
|---|---|
Softwood | High-speed steel or carbide-tipped |
Hardwood | Solid carbide |
The material of the router bit also affects longevity and cut quality. For instance, carbide bits last longer and perform better on harder materials. Here’s a summary of bit materials:
Material | Longevity | Cut Quality |
|---|---|---|
High-Speed Steel (HSS) | Wears out faster | Suitable for softer materials |
Carbide | Longer tool life | Ideal for harder materials |
Polycrystalline Diamond (PCD) | Exceptional wear resistance | Used for extremely hard materials |
Coated Bits | Last longer | More resistant to wear and heat |
Routing Direction
The direction in which you route can significantly influence the quality of your cuts. Routing against the grain can lead to tear-out, as wood fibers may catch and break apart. Conversely, routing with the grain results in smoother cuts and minimizes splintering. Here are some tips to avoid tear-out:
Always route with the grain when possible.
Use a climb cut for the final pass to achieve a clean edge.
Consider using a backer board to support the workpiece.
By mastering these techniques, you can enhance your precision woodworking skills and achieve outstanding results in your projects.
Safety Tips for Using a Router
Using a router can be rewarding, but safety should always come first. By following proper safety protocols, you can protect yourself and achieve better results in your woodworking projects.
Protective Gear
Wearing the right protective gear is essential when operating a router. Here are some key items you should always use:
Eye protection: Use goggles, safety glasses, or face shields to guard against flying debris.
Hearing protection: Wear ear defenders to prevent hearing damage from noise levels above 80 decibels.
Clothing: Opt for close-fitting clothing and non-skid shoes to reduce the risk of accidents.
Dust mask: Consider wearing a dust mask to protect your lungs from harmful particles.
Tip: Always ensure your workspace is well-lit and organized. A tidy environment helps you avoid trip hazards and keeps you focused on your work.
Operating Procedures
Following safe operating procedures is crucial for preventing accidents. Here are some effective practices to keep in mind:
Unplug the router before changing bits or making adjustments.
Use clamps to secure your workpiece. This prevents movement during routing.
Maintain a firm grip on the router. This helps you control the tool better and reduces the chance of slips.
Keep your hands away from the cutting area. Always position your hands safely to avoid injury.
Use dust extraction systems to minimize dust exposure. This not only keeps your workspace clean but also improves visibility and air quality.
By implementing these procedures, you can enhance your safety and achieve better results in your woodworking projects.
Maintenance
Regular maintenance of your router ensures safe operation and prolongs its lifespan. Here’s a table outlining essential maintenance tasks and their recommended frequency:
Maintenance Task | Frequency |
|---|---|
Cleanliness | Daily |
Change filters | Weekly |
Lubricate | Varies by use |
Air supply cleaning | Regularly |
Electrical safety checks | As needed |
Keeping your router clean prevents dust buildup, which can affect performance. Regularly check the electrical components to ensure they meet safety standards.
Note: Proper dust management is vital. It maintains a clean and safe working environment, increases productivity, and extends the life of your router.
By following these safety tips, you can enjoy woodworking with confidence and precision. Remember, safety is not just about protecting yourself; it also contributes to the quality of your results.
Common Mistakes to Avoid with a Router
Bit Usage
Improper bit usage can lead to poor results and safety hazards. Here are some common mistakes to avoid:
Incorrect feed direction: Always feed wood in the opposite direction of the bit’s rotation to prevent climb cutting.
Taking too much material in a single pass: This can dull bits faster and increase the risk of kickback. Instead, take multiple small passes for better results.
Using the wrong bit: Selecting improper bits can lead to rough finishes. For smooth results, use a dedicated slab-flattening bit.
Tip: Narrower bits can flex when you remove too much material, increasing the risk of kickback. Always choose the right bit for your project.
Safety Checks
Before starting any routing project, perform essential safety checks. Here’s a checklist to follow:
Unplug the router while changing bits or ensure it can’t power on.
Ensure enough of the bit shank is in the collet and that the collet is properly locked down.
Make sure nothing touches the bit when you turn the router on or off.
Wear personal protective equipment (PPE), including safety glasses and ear protection.
Always feed boards in the opposite direction of the router bit’s rotation.
Use push paddles to keep fingers safe from the bit.
By following these safety checks, you can prevent accidents and achieve better results.
Workpiece Support
Inadequate workpiece support can affect the outcome of your router operations. Here are some common issues:
A stable worktable is essential for maintaining precision during machining operations.
Features like vacuum systems and clamps help secure the material, preventing movement that could lead to inaccuracies.
Warped worktables can cause misalignment, resulting in parts being cut inaccurately.
Tip: Always ensure your workpiece is properly supported before starting. This will help you maintain precision and achieve the best results.
By avoiding these common mistakes, you can enhance your woodworking skills and ensure safer, more precise results with your router.
Practical Woodworking Applications
Using a router opens up a world of possibilities in woodworking. You can achieve stunning results in various projects, including edge profiling, joinery, and decorative inlays.
Edge Profiling
Edge profiling enhances the durability and aesthetics of your woodworking pieces. With a router, you can create smooth, polished edges that elevate the overall appearance of your projects. Here’s how edge profiling benefits your work:
Aspect | Description |
|---|---|
Precision | Routers provide a high degree of precision, allowing for consistent and uniform edges. |
Efficiency | They enable quick completion of tasks with minimal waste, crucial for commercial environments. |
Aesthetic Enhancement | Clean, smooth, and polished edges are produced, enhancing the overall appearance of the piece. |
Joinery
Joinery techniques executed with a router can outperform those done with other tools. You can create strong and precise joints that hold your projects together effectively. Here are some ideal joinery techniques for different router types:
Router Type | Ideal Joinery Techniques |
|---|---|
Trim Router | – Rounding over edges on shelves or tabletops |
– Flush trimming veneer or laminate | |
– Cutting small dadoes or rabbets in thin stock | |
– Routing hinge mortises or sign lettering | |
Full-Size Router | – Building furniture, cabinets, or large panels |
– Cutting deep dadoes, mortises, and grooves | |
– Shaping thick hardwood or wide boards | |
– Running large-profile bits or joinery jigs | |
– Using a router table for repeated cuts |
Decorative Inlays
Creating decorative inlays with a router adds a unique touch to your projects. Follow these steps for precision:
Prepare the inlay kit, which includes a small diameter bit and a removable bushing for cutting the recess.
Set the bit depth by making a test cut with a band saw and adjusting the plunge base accordingly.
Apply a thin coat of glue in the recess and press the inlay piece into it, ensuring it is level.
Use a flat piece of hardwood and a mallet to seat the inlay completely, being cautious not to damage the surface.
Allow the glue to set and then sand the inlay flush with the surrounding surface.
By mastering these applications, you can enhance your woodworking skills and achieve impressive results in your projects.
Using a router can greatly enhance your woodworking projects. Remember these key takeaways for achieving perfect results:
Choose a router with a 1/2-inch collet and variable speed control to handle various bits.
Select a plunge router for inlays and mortises, or a fixed-base router for edge work.
Prioritize features like a spindle lock for easy bit changes and dust collection for safety.
Familiarize yourself with pressure and feed patterns, and vary depths when routing grooves.
Use a straight edge to guide cuts for consistent depth.
Double-check results for clean cuts before proceeding.
Always practice safety by wearing eye protection and hearing protectors. Move slowly when making passes to ensure accuracy. Round edges to reduce splintering. With practice and attention to detail, you can master the art of routing and achieve precision in your woodworking projects.
FAQ
What is the best router for beginners?
For beginners, a fixed base router with a 1/4-inch collet is ideal. It offers stability and ease of use. Look for models with variable speed control to handle different tasks effectively.
How do I change a router bit safely?
Always unplug the router before changing bits. Use the collet wrench to loosen the bit. Insert the new bit, ensuring it fits securely. Tighten the collet firmly before plugging the router back in.
Can I use a router for cutting curves?
Yes, you can use a router for cutting curves. Use a template or a guide to help maintain the curve’s shape. A flush trim bit works well for this purpose.
How often should I clean my router?
Clean your router after each use. Remove dust and debris from the base and motor vents. Regular cleaning helps maintain performance and prolongs the tool’s lifespan.
What safety gear do I need when using a router?
Always wear safety glasses to protect your eyes from debris. Use ear protection to guard against noise. A dust mask can help prevent inhalation of harmful particles.