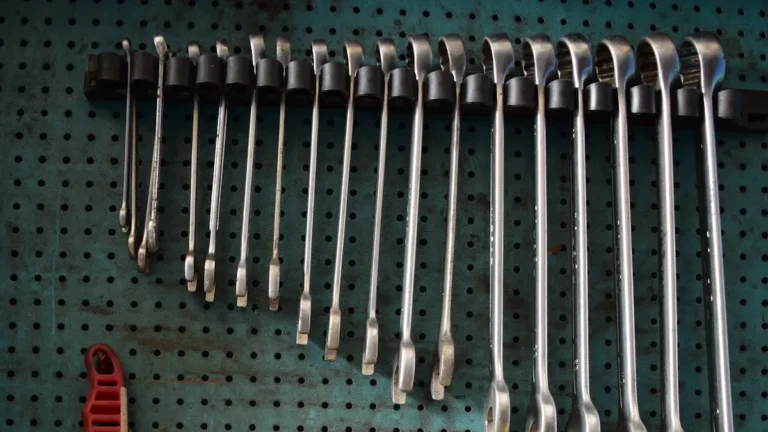
Sharpening your hand tools is crucial for both efficiency and safety. Sharp tools perform better, allowing you to complete tasks with less effort. Studies show that injuries from non-powered hand tools often result in cuts and lacerations. In fact, 68% of these injuries are due to dull tools. When you maintain a sharp edge, you not only improve your work quality but also reduce the risk of accidents. Remember, a well-sharpened tool enhances your performance and keeps you safe on the job.
Key Takeaways
Sharpening tools improves efficiency and safety, reducing the risk of injuries caused by dull blades.
Regular maintenance, including cleaning and inspecting tools, prolongs their lifespan and ensures optimal performance.
Understanding the specific sharpening techniques for different tools, like chisels and planes, enhances your woodworking results.
Recognizing signs of dullness, such as increased cutting resistance or tearing, helps you know when to sharpen your tools.
Establishing a consistent sharpening routine keeps your tools ready for any task, improving your overall craftsmanship.
Basics of Sharpening
Sharpening your tools is essential for maintaining their performance and longevity. When you sharpen your tools, you restore their edge, making them more effective for various tasks. A sharp tool requires less force, allowing you to work more efficiently. This efficiency not only saves time but also reduces the risk of accidents caused by slipping or applying excessive pressure.
Many myths surround the process of sharpening tools. Let’s debunk some of these misconceptions:
Misconception | Evidence Disproving the Myth |
|---|---|
Sharpening damages blades | Proper sharpening techniques restore blade performance and longevity without compromising strength. Neglecting to sharpen can cause more severe damage. |
All knives should be sharpened at the same angle | The ideal sharpening angle varies by knife type; for example, Japanese knives require a more acute angle for sharpness, while survival knives need a more obtuse angle for durability. |
Sharpening is a complex process | Basic knife sharpening principles are simple and accessible, allowing even novices to learn effective techniques with the right tools and guidance. |
To sharpen your tools effectively, follow these fundamental principles:
Clean tools of any dust, rust, or pitch using a wire brush or solvent.
Grind the primary bevel to the correct angle, using bench grinders while avoiding overheating.
Hone the edge with progressively finer abrasive stones, lubricated with water or oil.
Remove the fine wire edge or burr formed on the back of the blade by lightly stropping it on a fine stone or leather strop.
Polish the edge further by stropping on a leather strop charged with honing compound.
By understanding these basics, you can confidently approach sharpening as a beginner. This beginner-friendly guide will help you maintain your tools and ensure they perform at their best.
Chisel Sharpening

Sharpening a chisel is essential for achieving precise cuts and maintaining the tool’s longevity. A sharp chisel allows you to work efficiently and safely. Here’s how to sharpen your chisels effectively.
Flattening the Back
Before you sharpen the edge, you must flatten the back of the chisel. This step is crucial for ensuring that the chisel cuts accurately. Follow these steps:
Select a Flat Surface: Use a diamond stone or a flat waterstone. Ensure the surface is clean and free of debris.
Apply Even Pressure: Place the back of the chisel flat against the stone. Apply even pressure while moving it back and forth. This action removes any imperfections and creates a flat surface.
Check for Flatness: Use a marker to draw a line on the back. After a few strokes, check if the marker has been removed evenly. This indicates that the back is flat.
Tip: Regularly flatten the back of your chisels to maintain their performance. A flat back ensures that the edge aligns correctly with the workpiece.
Using Diamond Stones
Diamond stones are an excellent choice for sharpening chisels. They offer several advantages over traditional sharpening stones:
Superior Hardness and Cutting Speed: Diamond stones reshape hard tool steels quickly due to their high hardness rating.
Consistent Flatness: They maintain a flat surface over time, ensuring consistent sharpening angles.
No Oil or Water Required: You can use them without lubricants, making them convenient for quick touch-ups.
Versatility Across Tool Types: They work effectively for chisels, gouges, and knives.
Long Lifespan: With proper care, diamond stones can last for decades.
To sharpen a chisel using diamond stones, gather the following tools:
A Rough Stone: 400-800 grit rough diamond plate or two carborundum stones.
Medium Stones: Two 1,000 grit synthetic waterstones.
A Finish Stone: 6,000-8,000 grit synthetic waterstone.
Now, follow this step-by-step process for sharpening a chisel:
Blunt the End: Draw a stop line on the back of the chisel. Grind the end on a coarse wheel to remove nicks.
Choose a Honing Guide: Decide between side-clamping or top-to-bottom clamping guides based on the chisel’s thickness.
Set the Grinding Angle: Use a protractor to set a 25-degree angle on the grinder.
Grind to a Sharp Edge: Grind the chisel while cooling it in water to prevent overheating.
Create Two Bevels: Sharpen the chisel at 25 degrees for grinding and 30 degrees for honing to save time and energy.
Chisel Type | Sharpening Approach | Reason for Approach |
|---|---|---|
Japanese Chisels | Hand-honing methods | Hollow ground on the back reduces steel removal; brittle steel requires careful handling. |
Convex Back Chisels | Careful grinding techniques | Risk of exacerbating convexity; requires steady handling to avoid rocking during sharpening. |
Mortising/Firmer | Higher bevel angles with a primary bevel of 25° and a 10° microbevel for strength | Designed to withstand impact stress; higher angles help maintain edge durability during heavy use. |
By following these steps and using the right tools, you can sharpen your chisels effectively. A well-sharpened chisel not only improves your work quality but also enhances your overall woodworking experience.
Plane Sharpening
Sharpening a plane is essential for achieving smooth, flat surfaces in woodworking. A sharp plane allows you to work efficiently and produce high-quality results. Here, you will learn about effective techniques for sharpening your planes, including the Norton Stone Method and buffing techniques.
Norton Stone Method
The Norton Stone Method is a popular technique for sharpening plane blades. This method involves using a series of sharpening stones to achieve a razor-sharp edge. Here’s how to do it:
Gather Your Tools: You will need a set of sharpening stones, typically ranging from coarse to fine grits. A common sequence is 3000, 8000, and 12000 grit stones.
Flatten the Back: Before sharpening, ensure the back of the blade is flat. This step is crucial for achieving a precise edge.
Shape the Primary Bevel: Use a bench grinder or belt sander to shape the primary bevel to about 25 degrees. This angle provides a good balance between sharpness and durability.
Sharpening Process:
Start with the coarser stone if the edge is worn.
Progress through the finer stones, spending more time on each to refine the edge.
Experiment with different stones to find the best results for specific woods.
Using this method, you can maintain the blade’s temper and prevent damage during sharpening. Many professional woodworkers recommend this approach for its effectiveness in achieving a sharp edge.
Buffing Techniques
Buffing is an important step in sharpening a plane. It helps achieve a polished edge and removes any remaining burr. Here are some effective buffing techniques:
Stropping: This technique is essential for achieving a razor-sharp edge. Stropping polishes the edge to a reflective sheen and extends the time between full sharpenings.
Use a Leather Strop: A leather strop charged with honing compound works well for buffing. Simply draw the blade across the strop at the same angle as the bevel.
Frequent Buffing: Regularly buffing your plane blades can significantly improve their performance. It keeps the edge sharp and ready for use.
By incorporating these techniques into your sharpening routine, you can enhance the performance of your planes and achieve better results in your woodworking projects.
Feature | Bench Plane | Block Plane |
|---|---|---|
Usage | General purpose, suitable for larger surfaces | Ideal for one-handed use, smoothing and trimming |
Design | Typically larger, with a chip breaker | Smaller, with the bevel facing up, no chip breaker |
Angle of Iron | Steeper angle for cutting | Lower angle for easier use |
Understanding the differences between bench planes and block planes can also help you choose the right tool for your tasks. For example, the No. 102 Apron Plane is compact and perfect for quick tasks, while the Rabbeting Block Plane excels in precise shavings in corners.
By mastering these sharpening techniques, you will ensure that your planes remain effective and reliable tools in your woodworking arsenal.
Saw Sharpening
Sharpening a saw is essential for maintaining its performance and ensuring clean cuts. Different types of saws require specific techniques for effective sharpening. Here’s a look at the techniques for hand saws and power saws.
Techniques for Hand Saws
You can sharpen hand saws using a straightforward process. Follow these steps:
Clean the Handsaw: Remove any debris or pitch from the blade. A clean surface allows for better sharpening.
Inspect the Teeth: Check for any worn or damaged teeth. If necessary, joint them using a mill file.
Re-cut the Shapes: Use a three-square file to reshape the teeth. Ensure they are pointed and free of shiny flat spots.
Set the Teeth: Use a saw set to alternate the teeth left and right. This step prevents binding during cuts.
Sharpen the Teeth: Finally, sharpen the teeth with a triangular file. Adjust the angle based on whether you are sharpening a rip saw or a crosscut saw.
Tip: Regularly inspect and sharpen your hand saws to maintain their edge and performance.
Techniques for Power Saws
Power saws also require proper sharpening techniques. Here are some key considerations:
Safety First: Always wear protective gear such as gloves and goggles. Ensure the blade is securely fastened before sharpening.
Follow Manufacturer Guidelines: Adhere to the tool manufacturer’s instructions to avoid accidents.
Use the Right Tools: Employ a specialized sharpening tool designed for power saw blades. This ensures precision and effectiveness.
Power saws often have different sharpening needs compared to hand saws. For instance, the design of a blade affects how you sharpen it.
Here are some common saw types and their characteristics:
Western Push Saws: Cut on the push stroke and have thicker blades. They require specific sharpening techniques due to their design.
Japanese Pull Saws: Cut on the pull stroke and feature thinner blades. Their sharpening needs differ from push saws.
Backsaws: Have a stiffened rib for precision, affecting how you sharpen them compared to regular hand saws.
Flush Trim Saws: Designed for flush-cutting, they have zero tooth set, influencing their sharpening approach.
By understanding these techniques and the types of saws, you can effectively maintain your tools and ensure they perform at their best.
Knife Sharpening

Sharpening a knife is essential for maintaining its performance and safety. A sharp knife allows you to cut through materials with ease. One effective method for achieving a razor-sharp edge is using a strop.
Using a Strop
A strop helps refine the edge of your knife after sharpening. It polishes the blade and removes any burrs that may have formed during the sharpening process. Here’s how to use a strop effectively:
Select the Right Strop: Choose a leather strop or one made from canvas. You can also use a strop charged with honing compounds for better results.
Angle the Blade: Hold the knife at the same angle as the bevel. This angle typically ranges from 15 to 20 degrees.
Draw the Blade: Gently pull the blade across the strop, moving from the heel to the tip. Repeat this motion several times on each side of the blade.
Users report that finishing sharpening with stropping using specific compounds, like 4µ Diamond Emulsion, leads to noticeably better results in sharpness. If done well, stropping is likely the best way to maintain a good working edge on a blade.
Testing Sharpness
After sharpening your knife, you need to test its sharpness. Here are some reliable methods to check if your knife is ready for use:
Visual Inspection: Examine the blade edge under bright light for nicks and imperfections.
The Tomato Test: Cut a tomato to see if the knife glides through without crushing.
The Paper Test: Slice a piece of paper; a sharp knife will cut cleanly.
The Shaving Test: Attempt to shave hair; a sharp knife will do this effortlessly.
The Fingernail Test: Lightly tap the blade against your fingernail; a sharp edge will catch.
The Thumb Test: Run your thumb perpendicular to the blade; a sharp knife will feel smooth and slightly grab.
By incorporating these techniques into your knife maintenance routine, you can ensure that your knives remain sharp and effective for all your cutting tasks.
Maintaining Sharpness
Regular Maintenance Tips
To keep your tools sharp and ready for use, follow these regular maintenance tips:
Clean your tools after each use to remove dirt and debris. This practice prevents buildup that can dull the edge.
Check for any damage that may affect performance. Look for nicks or chips on blades.
Lubricate moving parts to ensure smooth operation. This step helps maintain the edge and prolongs tool life.
Sharpen tools as needed, especially bladed tools. Regular sharpening helps maintain the edge and efficiency.
After sharpening, you should also clean and oil your tools to prevent rust and wear. Here’s how:
Dry the blade with a clean rag or paper towel after sharpening.
Apply Corrosion Block to ensure a complete coating and draw out moisture.
Wipe off the Corrosion Block and apply CRC 3-36 for long-term rust prevention.
Tip: Store tools in a dry place to prevent rust. Use rust prevention products like Boeshield T-9 after cleaning.
Signs Your Tools Need Sharpening
Recognizing when your tools need sharpening is crucial for maintaining their performance. Here are some common signs:
You experience increased resistance when cutting. If you find yourself pressing harder, it’s time to sharpen.
Tearing instead of slicing occurs. If foods like herbs or tomatoes get crushed rather than cleanly sliced, your knife may be dull.
You notice a shiny or reflective edge. A sharp blade has a fine edge; if you see light reflecting off it, it has likely rounded or flattened.
You hear a dull sound when cutting. A sharp knife produces a clean, smooth slicing sound, while a dull knife makes a dragging noise.
By following these maintenance tips and recognizing the signs of dullness, you can keep your tools in top condition and maintain the edge effectively.
Maintaining sharp hand tools is vital for your efficiency and safety. Regular sharpening enhances tool performance, providing clean cuts and improving the quality of your work. Here are some key benefits of sharpening your hand tools:
Sharp tools elevate craftsmanship and ensure effective results.
A consistent sharpening schedule prolongs the lifespan of your tools.
Neglecting to sharpen can lead to ineffective tools and potential damage.
Experts recommend establishing a routine for sharpening. You can use various grits of sandpaper for effective results. Remember, regular maintenance keeps your tools ready for any task. Embrace the practice of sharpening your hand tools to enjoy better performance and safety in your projects!